This is a step-by-step guide on how to deploy a Streamlit Dashboard using docker and Azure the Prerequisites are:
- Docker and Docker Account
- Any IDE of your choice I’m using vscode
- Azure account and Azure CLI
If you have the prerequisites ready we will crack on with building a very simple streamlit dashboard.
Run the Web Application Locally
-
We will make the home directory we will be working from. I have called it
testDirinside of thetestDirdirectory, we will create another directory calledappand inside theappdirectory we will create the files we need to get the Streamlit dashboard to run locally first before we containerize. -
Inside the
/appdirectory we will create the main file that holds the dashboard, we will call itstreamlit_app.pyand paste the following code in this file.
from collections import namedtuple
import altair as alt
import math
import pandas as pd
import streamlit as st

"""
# Welcome to Streamlit!

Edit `/streamlit_app.py` to customize this app to your heart's desire :heart:

If you have any questions, checkout our [documentation](https://docs.streamlit.io) and [community
forums](https://discuss.streamlit.io).

In the meantime, below is an example of what you can do with just a few lines of code:
"""

with st.echo(code_location='below'):
   total_points = st.slider("Number of points in spiral", 1, 5000, 2000)
   num_turns = st.slider("Number of turns in spiral", 1, 100, 9)

   Point = namedtuple('Point', 'x y')
   data = []

   points_per_turn = total_points / num_turns

   for curr_point_num in range(total_points):
      curr_turn, i = divmod(curr_point_num, points_per_turn)
      angle = (curr_turn + 1) * 2 * math.pi * i / points_per_turn
      radius = curr_point_num / total_points
      x = radius * math.cos(angle)
      y = radius * math.sin(angle)
      data.append(Point(x, y))

   st.altair_chart(alt.Chart(pd.DataFrame(data), height=500, width=500)
      .mark_circle(color='#0068c9', opacity=0.5)
      .encode(x='x:Q', y='y:Q'))
-
We will then create the
requirements.txtand paste or type in the dependencies, we need to run this web app it should look like this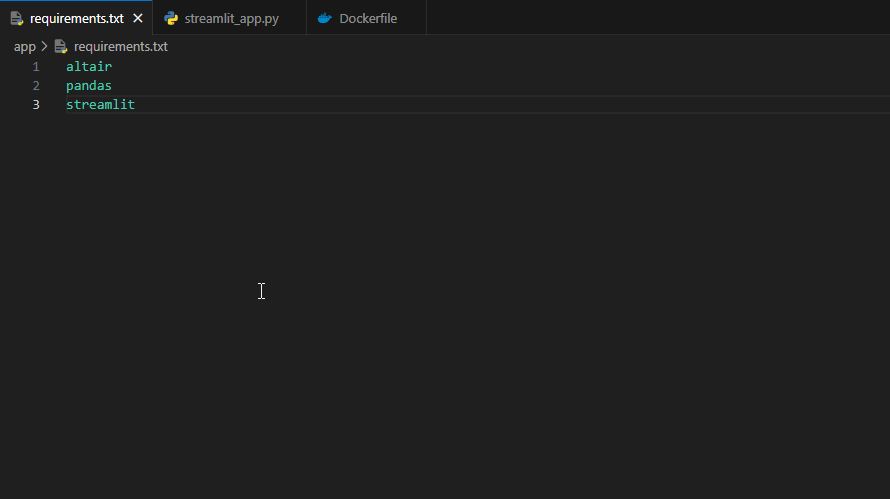
-
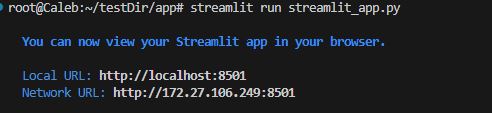
Now we want to be sure that the streamlit app runs locally so after saving the code, open the terminal in your vscode, if you’re not already in the
appdirectory move to the/appdirectory withcd app, and use this code to run your streamlit appstreamlit run streamlit_app.py. You should have an output like this
-
Click on the ip address on the output or copy the ip address and paste it into your browser you should have a result like:
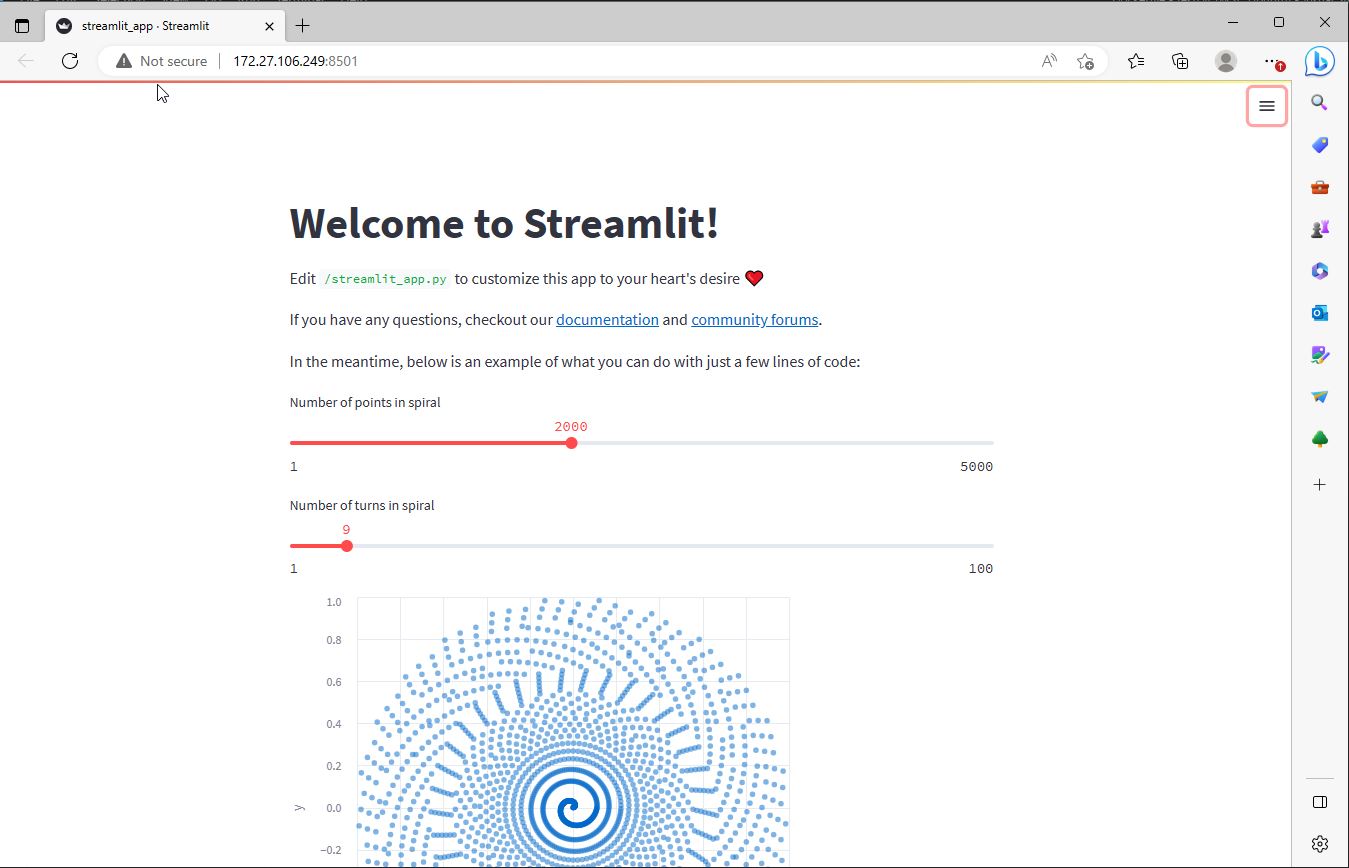 .
.
Usectl cto stop the web application.
Let’s Connect/Login to Azure & and Dockerize!
First, we want to make sure we have docker and azure-cli installed and that we are logged in to the Azure portal.
Check if docker has been installed docker --version if you have docker installed you should get an output like  .
.
Check azure-cli az --version if azure-cli is installed you should have an output like 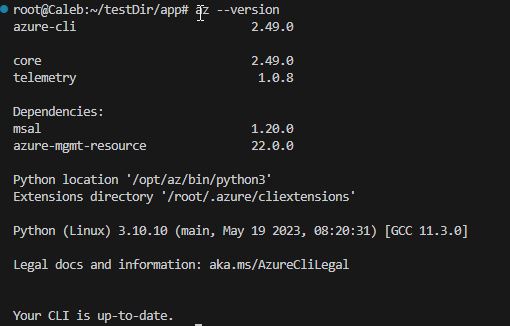
Now we have confirmed that we have what we need, the next steps!
- We will add a Dockerfile, to help build the Docker image we need. Create a file in the
appdirectory and name itDockerfilethere’s no file extension for this file.
Paste this code into yourDockerfile
# app/Dockerfile

FROM python:3.9-slim

WORKDIR /app

RUN apt-get update && apt-get install -y \
    build-essential \
    curl \
    software-properties-common \
    git \
    && rm -rf /var/lib/apt/lists/*

COPY . .

RUN pip3 install -r requirements.txt

EXPOSE 8501

HEALTHCHECK CMD curl --fail http://localhost:8501/_stcore/health

ENTRYPOINT ["streamlit", "run", "streamlit_app.py", "--server.port=8501", "--server.address=0.0.0.0"]
-
Now we want to login to our Azure from the CLI or Terminal using the
az logincommand. If after your login and you get a message saying something like
No subscriptions found for your@email.com.You might want to check and make sure you have an active subscription. -
If you have an active subscription, you will need to use the tenant ID to log in so your subscription can be added. something like
az login <TENANT ID>
Side Note: If you don’t know where to get your tenantID
Go to your Azure portal, in the search bar type in
tenantIDand then click on Tenant properties you will find the tenantID go on and copy it then use it to complete the login.
Create a repository on Azure Container registries to store your docker image on the Azure Portal
We will do this on the Azure portal
-
On the portal, search for
Container registriesclick on it and click on create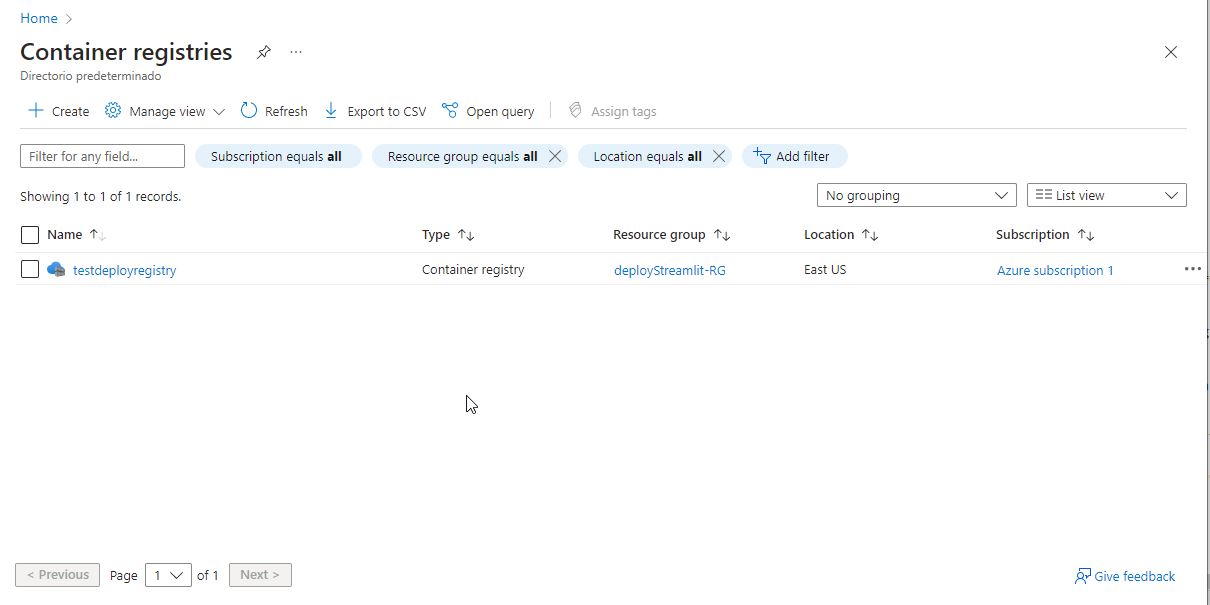
-
You should have something like this when you click on create
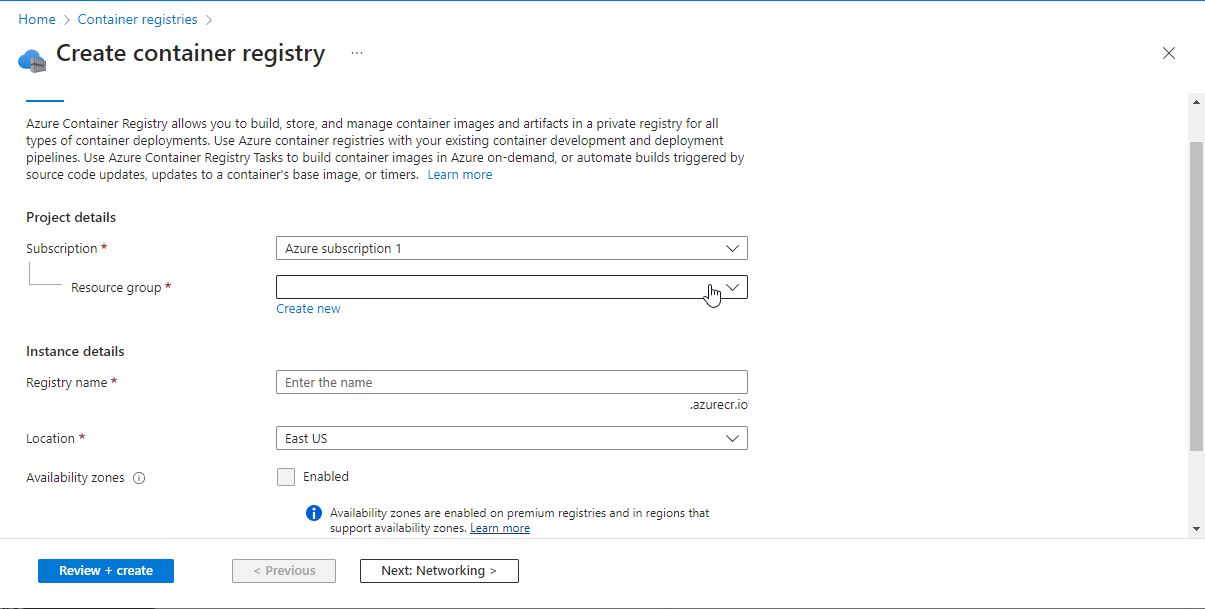 You can create a new resource group if you don’t have one.
You also have to choose a name for your registry and it has to be unique.
You can create a new resource group if you don’t have one.
You also have to choose a name for your registry and it has to be unique. -
Once you have chosen a resource group and a name for your registry click on
review + createand go on to create the registry by clicking inCreate. -
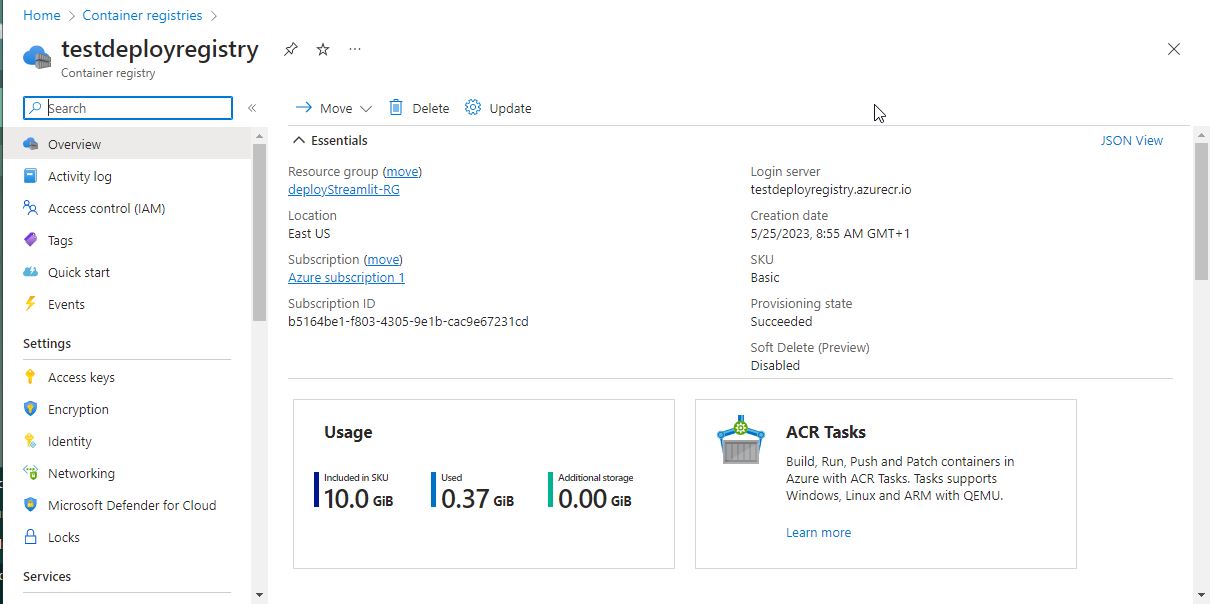
After creating the registry, your registry dashboard should look like this
Build a docker image and deploy it to Azure Container Registry
- One more thing we want to do is to enable the Admin user and get login credentials to use in pushing a docker to this registry
Click on
Access keyson the left and then enable Admin user, you will get your credentials and then you want to leave this page open or copy the credentials to a notepad because you will need it shortly.
It should look like this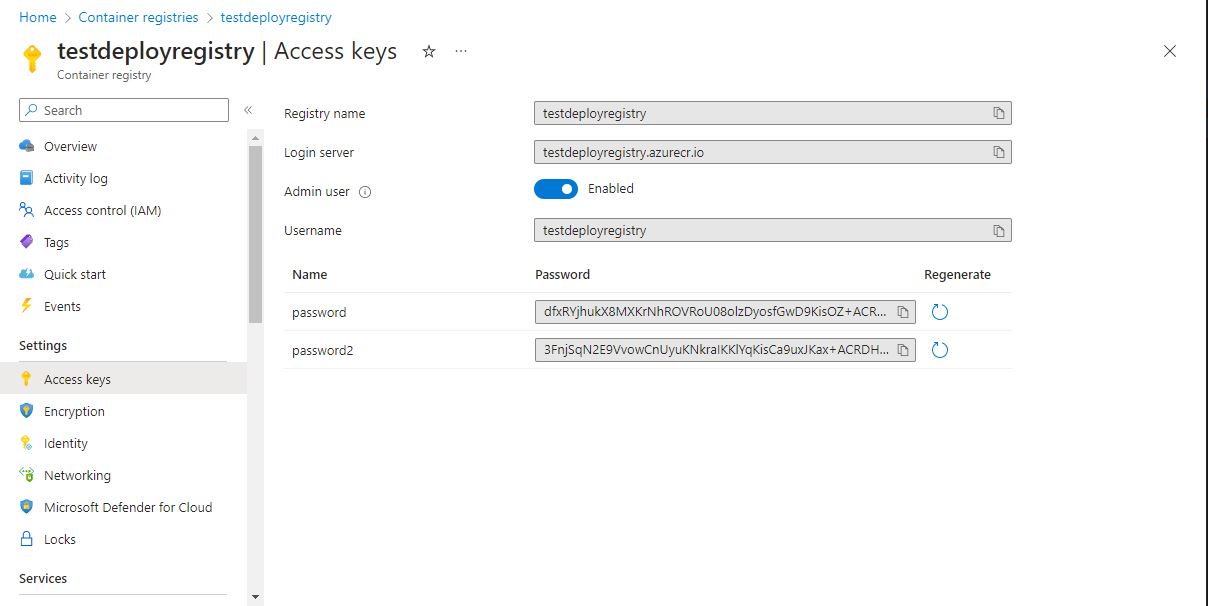
Now go back to the IDE in my case vscode
-
We will login to the Azure container registry so we can push a docker image there, using this command
az acr login --name <Registry name>in my caseaz acr login --name testdeployregistry -
You will be asked for a username and password. This username and password are the ones we saw in the
Access keyssection, so go on to input the credentials. -
Tag the image using this format
docker tag <docker_username/image_name login_server/image_name:v1in my casedocker tag 08102414530/streamlit testdeployregistry.azurecr.io/streamlit:v1 -
Push the image to Azure container registry
docker push login_server/image_name:v1in my casedocker push testdeployregistry.azurecr.io/streamlit:v1. Your output should look like this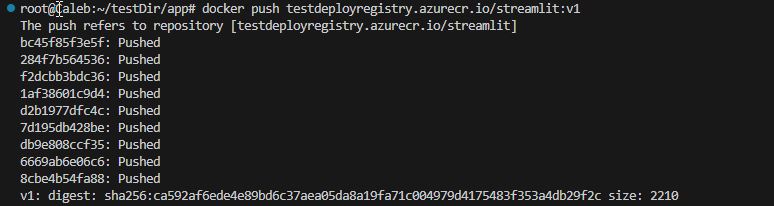
If you have successfully pushed, we will confirm the pushed image on the Azure portal
- Go back to the Azure portal and Search for
Container registries - Click on the registry you created initially
- On the left side, scroll down and click on
RepositoriesThere you can see the image we just pushed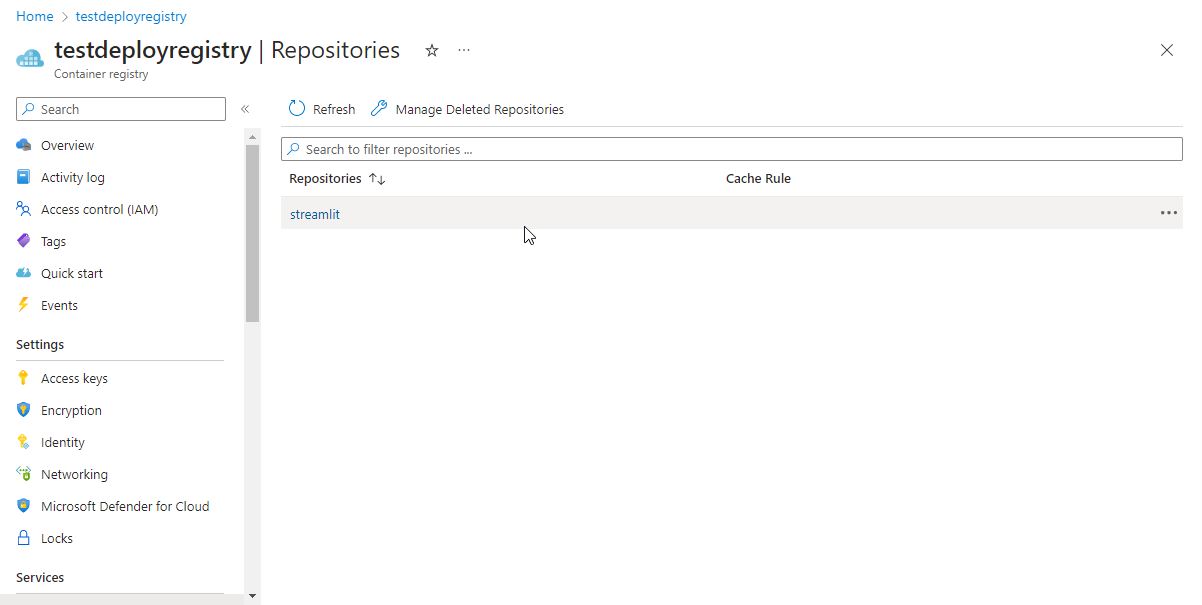
Now we will go back to vscode to run the docker image
- On the terminal run
docker run --rm -p 8501:8501 login_server/image_name:v1in my casedocker run --rm -p 8501:8501 testdeployregistry.azurecr.io/streamlit:v1
Your output should look like this 
-
Click on the ip address or paste it into your browser
-
This container is now running from the image we pushed to Azure’s container registry
 if you made it to this point congratulations!! we are almost there!
Deploy the image to Azure App services
This will be done on the portal
- Go back to the Azure portal and Search for
Container registries> Click on the registry you created initially in my casetestdeployregistry -
On the left side, scroll down and click on
RepositoriesThere you can see the image we just pushed > Click on the image in my case the image isstreamlit -
When you open the image you will see the tag we created earlier initially called
v1. -
Click on the 3 dots on the end and you will get options click on
Deploy to web app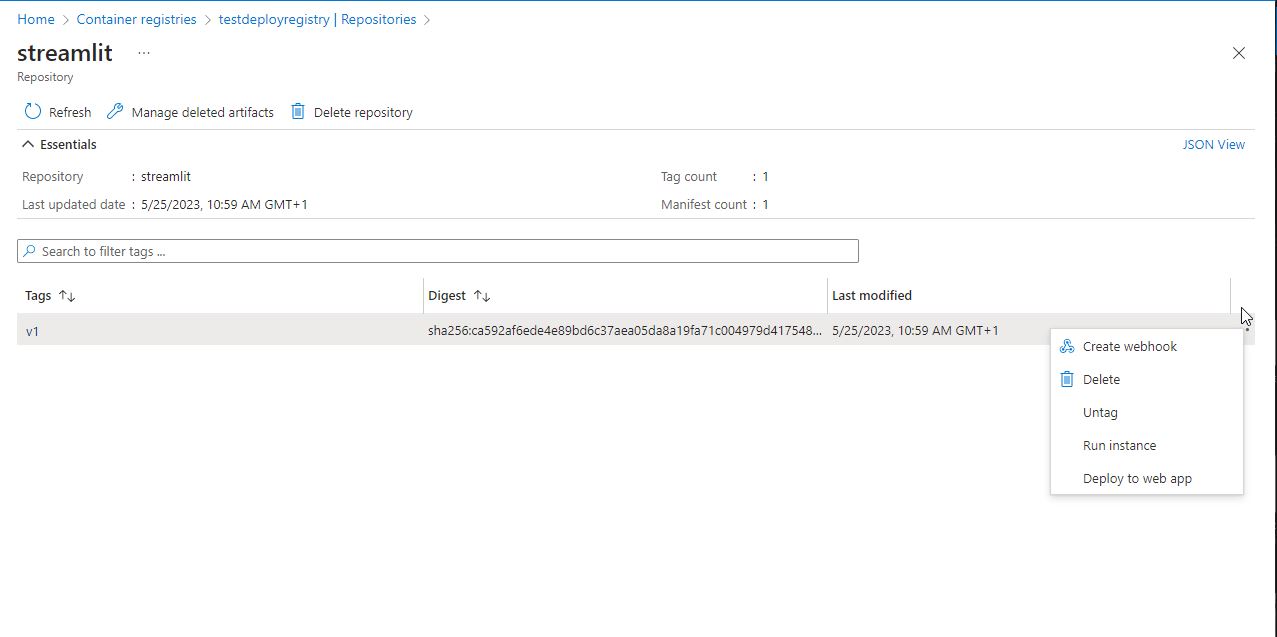
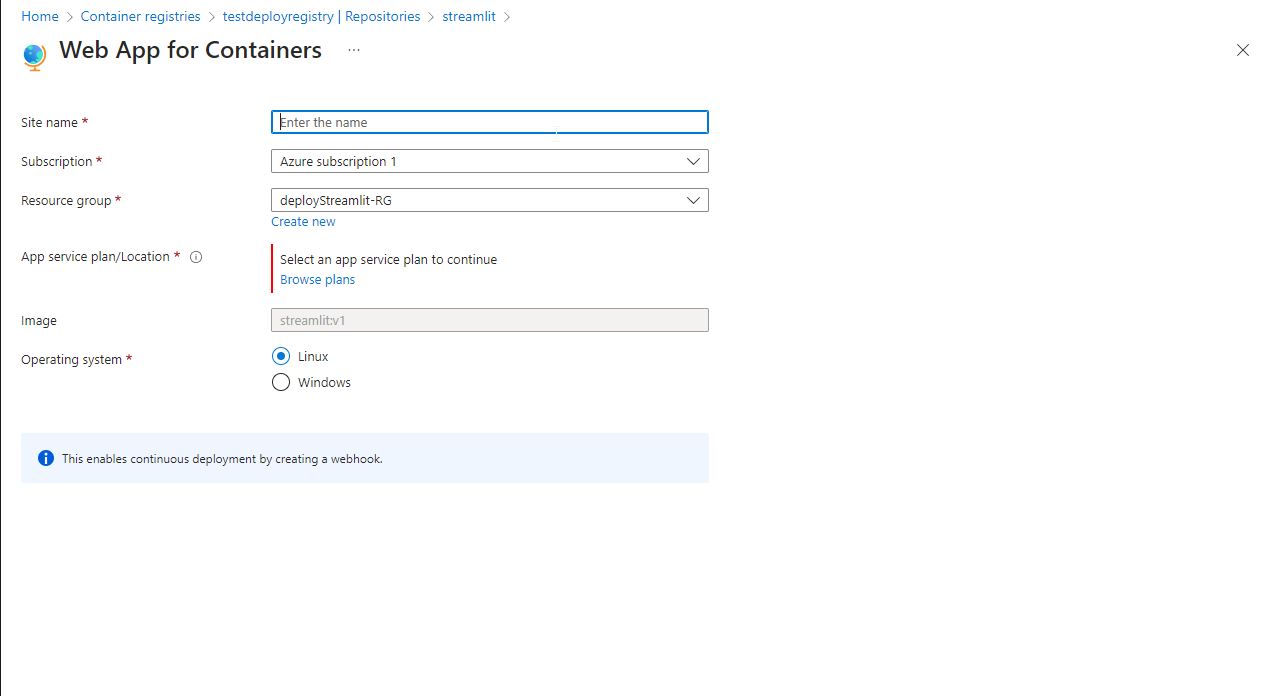
- The next page is where you choose the site name, for me, I used
test-deploy-streamlit, notice I also used the same resource group and subscription to make sure I have everything in one place for the tutorial. Then Click onCreate.
Once the deployment is complete we want to check our deployment on Azure app services.
-
On the search bar type in
App Servicesand Click on the service and there you will find the web app we just deployed.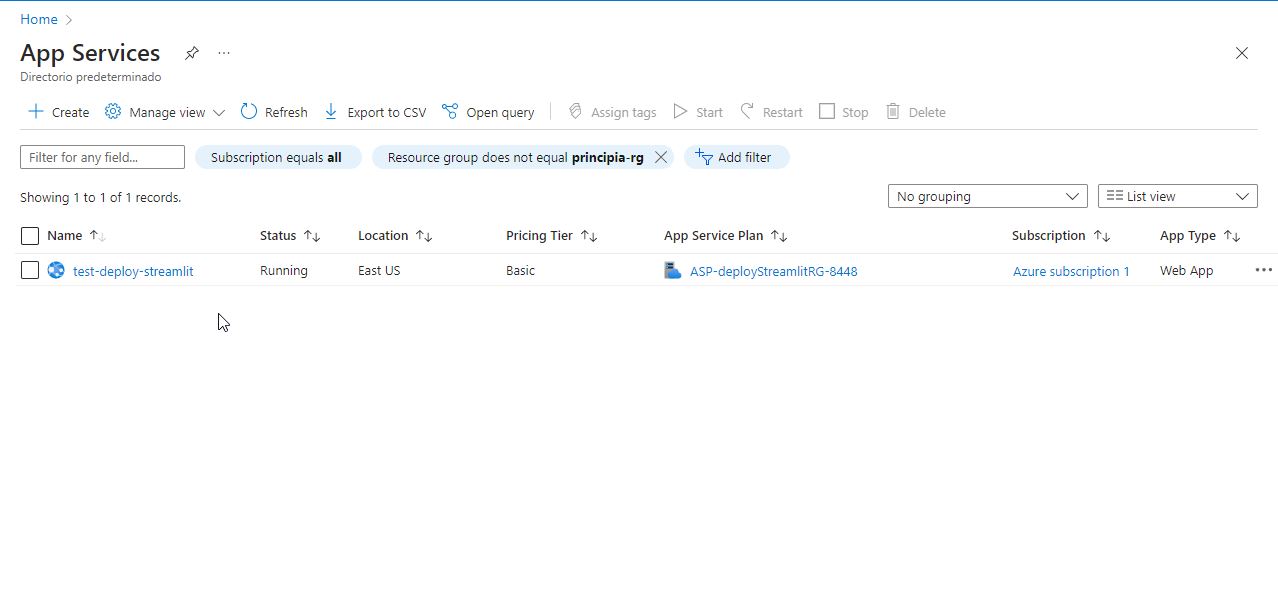
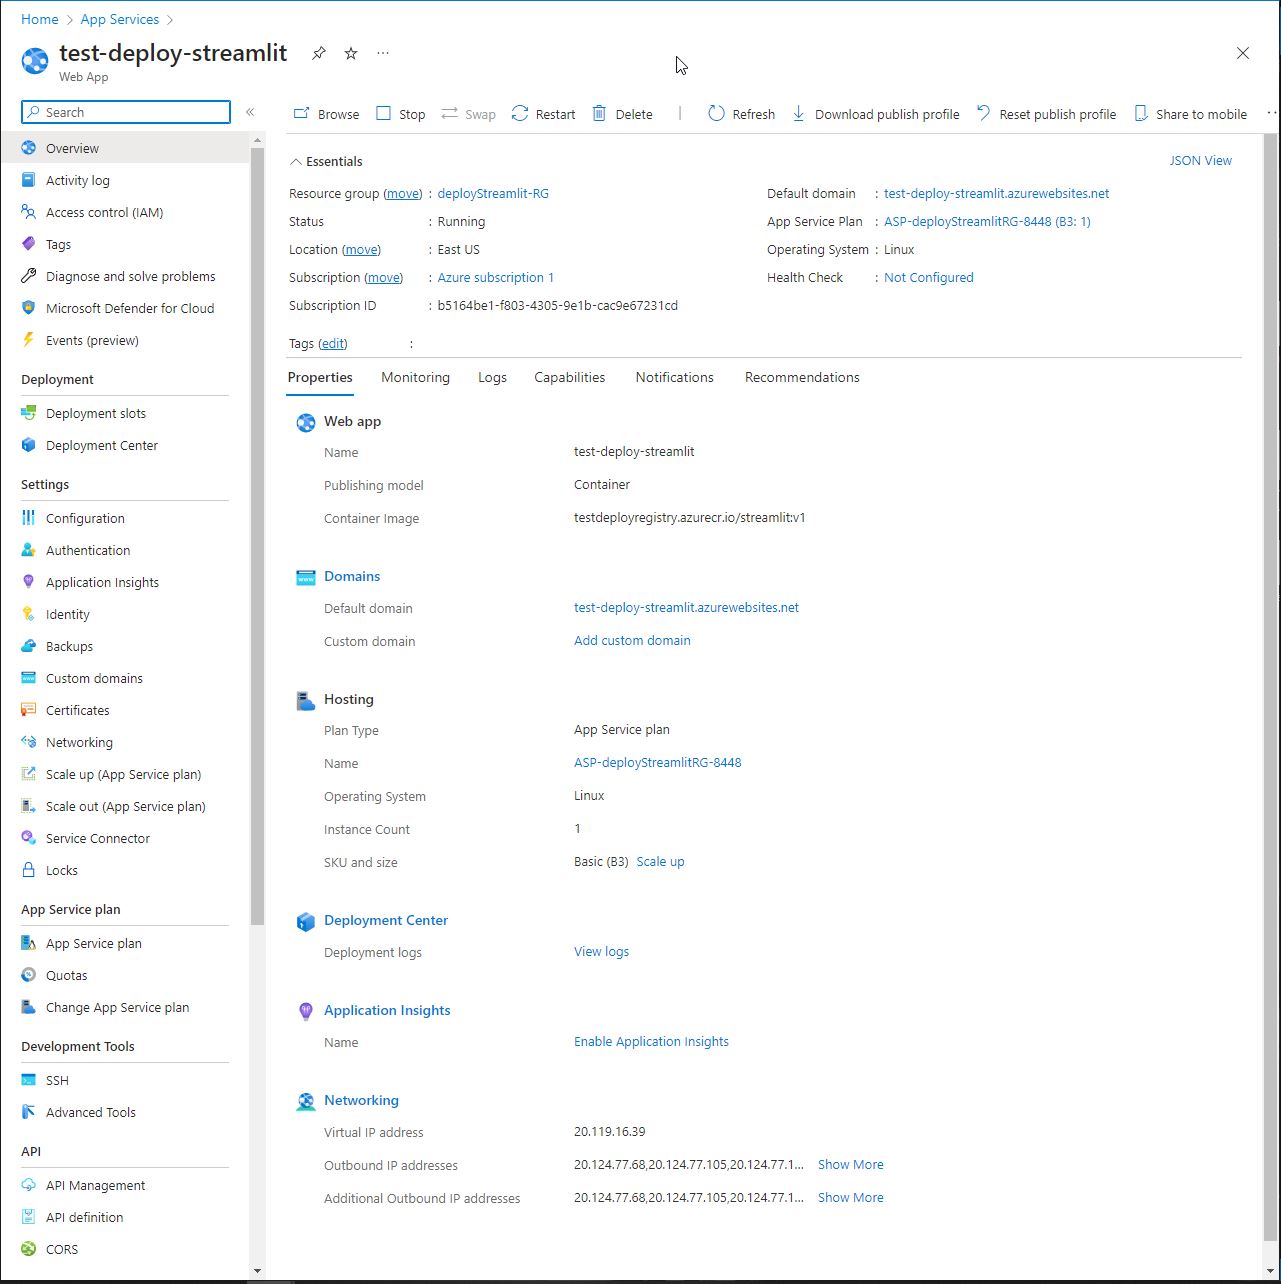
-
Click on the web app we just deployed and on the dashboard, when you find the endpoint/link of the web app at the
Default domainclick on the link/endpoint
-
Here’s the final result! Notice the endpoint having the name we specified during the creation of the web app.
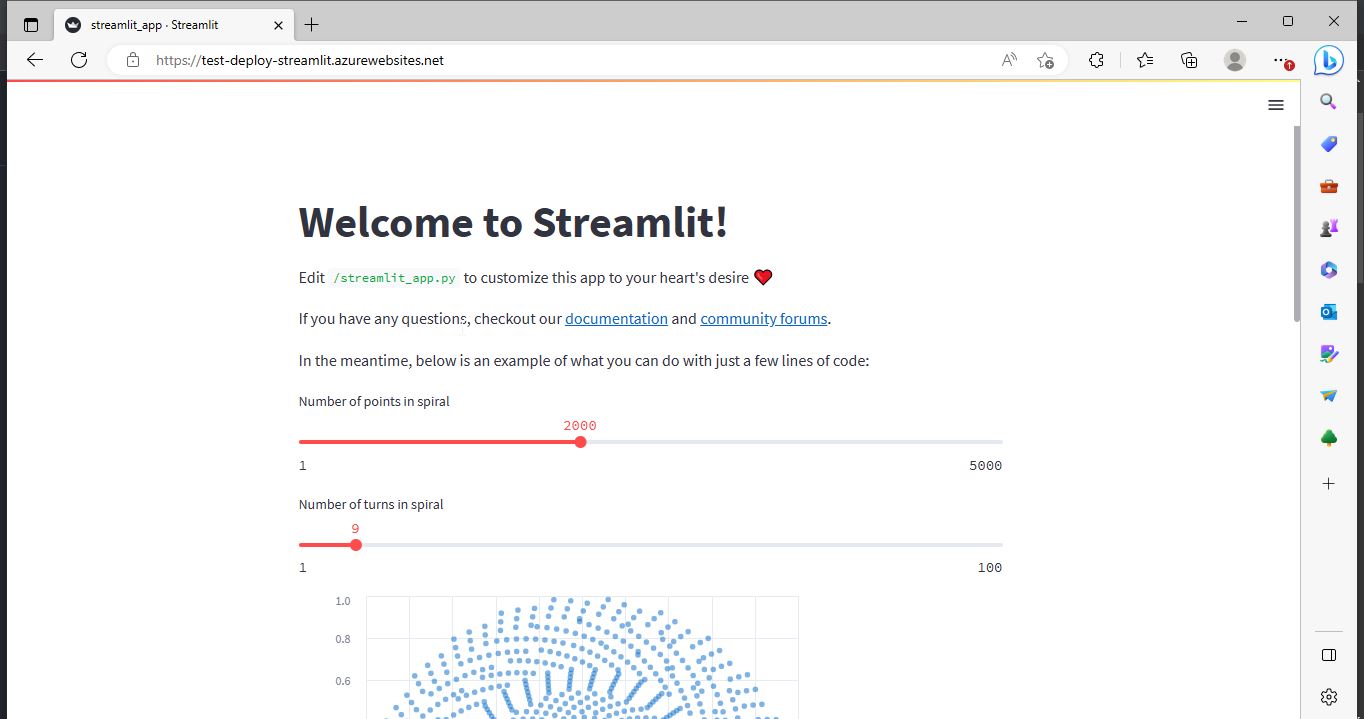
Congratulations!! You have gotten to the end of this tutorial, I hope you found it helpful.